![]()
![]()
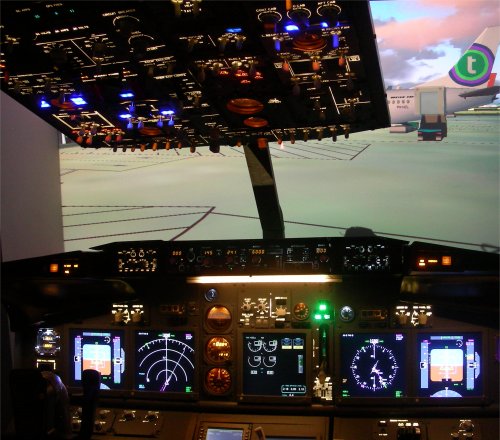
by Pim van Vrijaldenhoven
| For a chronological list of events you really should start at Phase 1 and work you way to the top. | |||||
|
Januari 2025
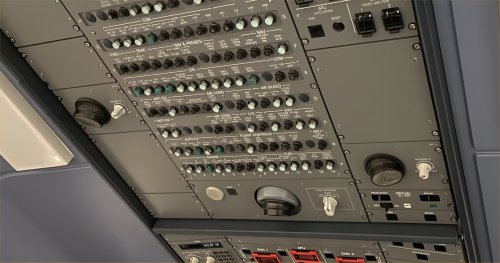
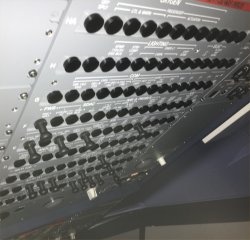
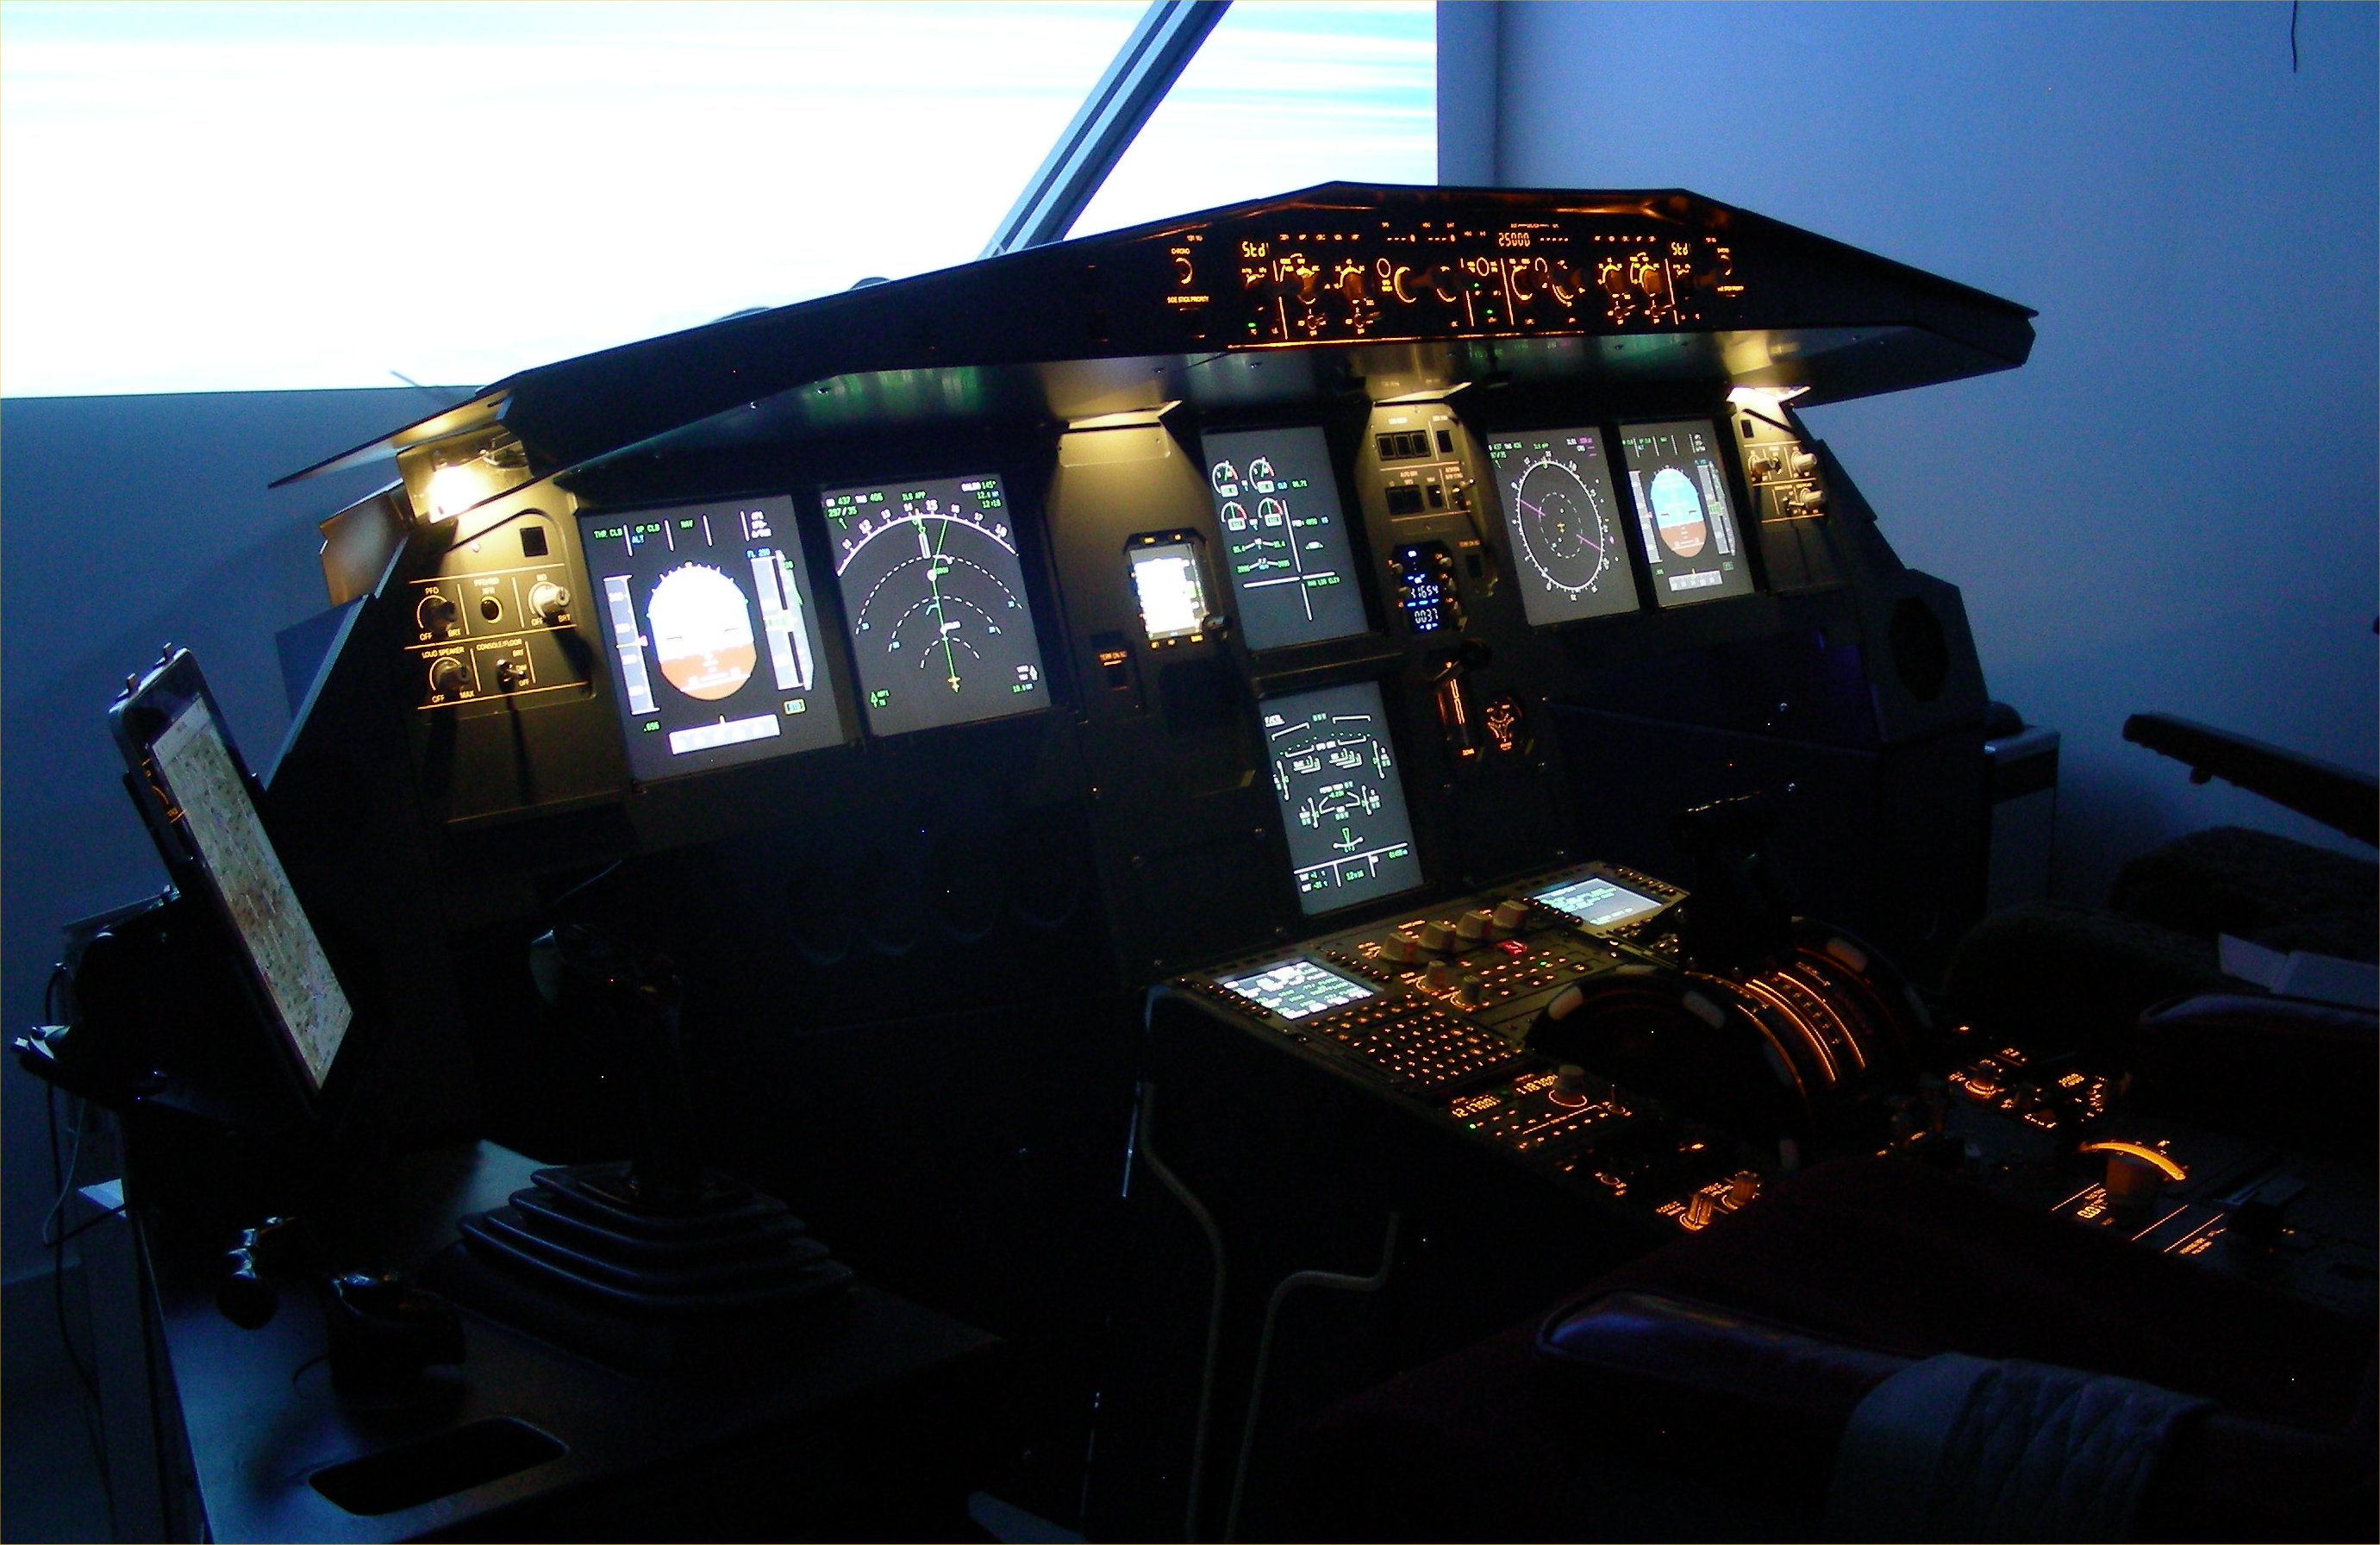
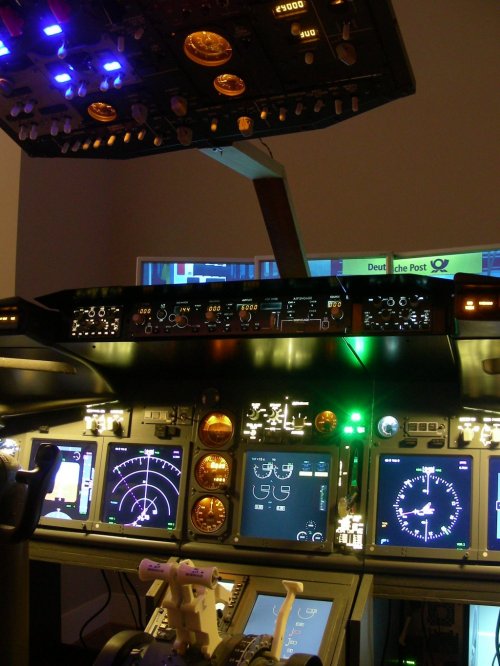
Upgrading the Reading Lights and Floodlight in the Skalarki Overhead I've never been a fan of Skalarki’s implementation of the light fixtures in their overhead panels. A few years ago, I purchased two OEM 54VU light panels intending to upgrade. Unfortunately, upon returning home, I discovered that the panels were physically incompatible with the VierImPott overhead structure. Additionally, these OEM panels use a 5-volt backlighting system and a 28V high-power incandescent bulb, which doesn’t align with Skalarki’s electronics. Recently, I came across these panels while sorting through a drawer and decided to repurpose their light fixtures. To make it work, I drilled a 60 mm hole in the Skalarki panel to mount the light fixture and replaced the original bulb with a 12V light strip consisting of two sets of three LEDs. The next task was upgrading the floodlight in the Audio Switching Panel. For this, I sourced an OEM 48VU Audio Switching Panel and extracted its light fixture. This required a 90 mm hole in the Skalarki panel. As before, I swapped out the bulb for a 12V light strip to ensure compatibility.
|
 |
||||
| December 2024
It has been a long time since I updated this website
The PTT
button on the Peiker microphone is just a simple switch, so
you can connect it to a spare input on a Leo Bodnar card.
Since I am using a Logitech Extreme 3D Pro as the side stick
base, I use one of its button inputs. The button input can
be read directly by an ATC program like vPilot,
SayIntentions or Beyond ATC. It can also be read by
ProSimA322, that’s what I do. ProSimA322 has a gate
“Loudspeaker Mute” that I use to trigger the ATC PTT
function. The beauty of it is that if you pull any of the
side stick PTT buttons (Captain or F/O) or the RAD switches
on the ACP's or the microphone PTT buttons, it will then
activate the ATC PTT function.
|
 |
||||
February 2022
|
 |
||||
|
October
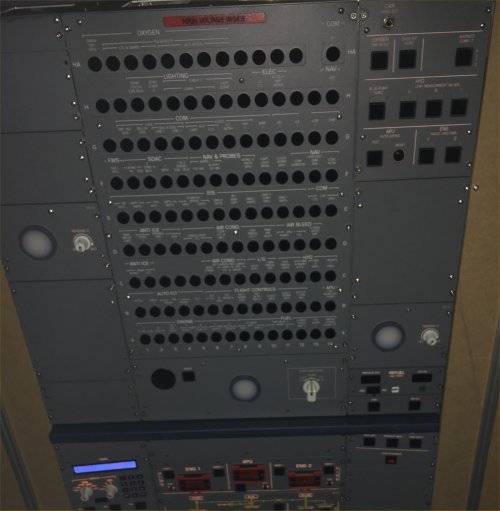
2017 The dome lights are now controlled via a Phidgets 0/16/16 card. By adding a series resistor for each dome light, both bright and dim levels can be set. Since ProSimA320 supports a large number of Circuit Breakers, automotive pull switches where added on the CB panel. These are connected to the Phidgets 0/16/16 and a 8/8/8 card. Future project:
|
  |
||||
|
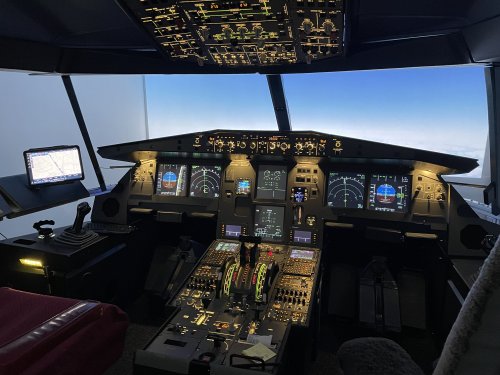
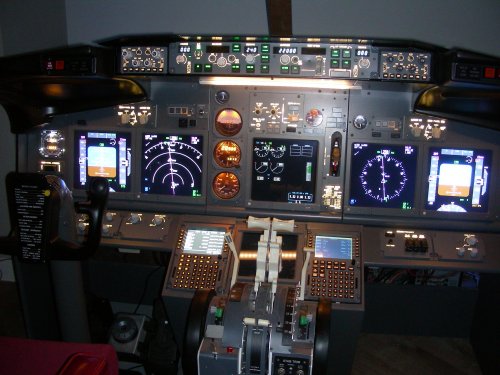
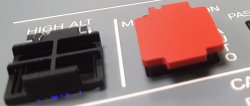
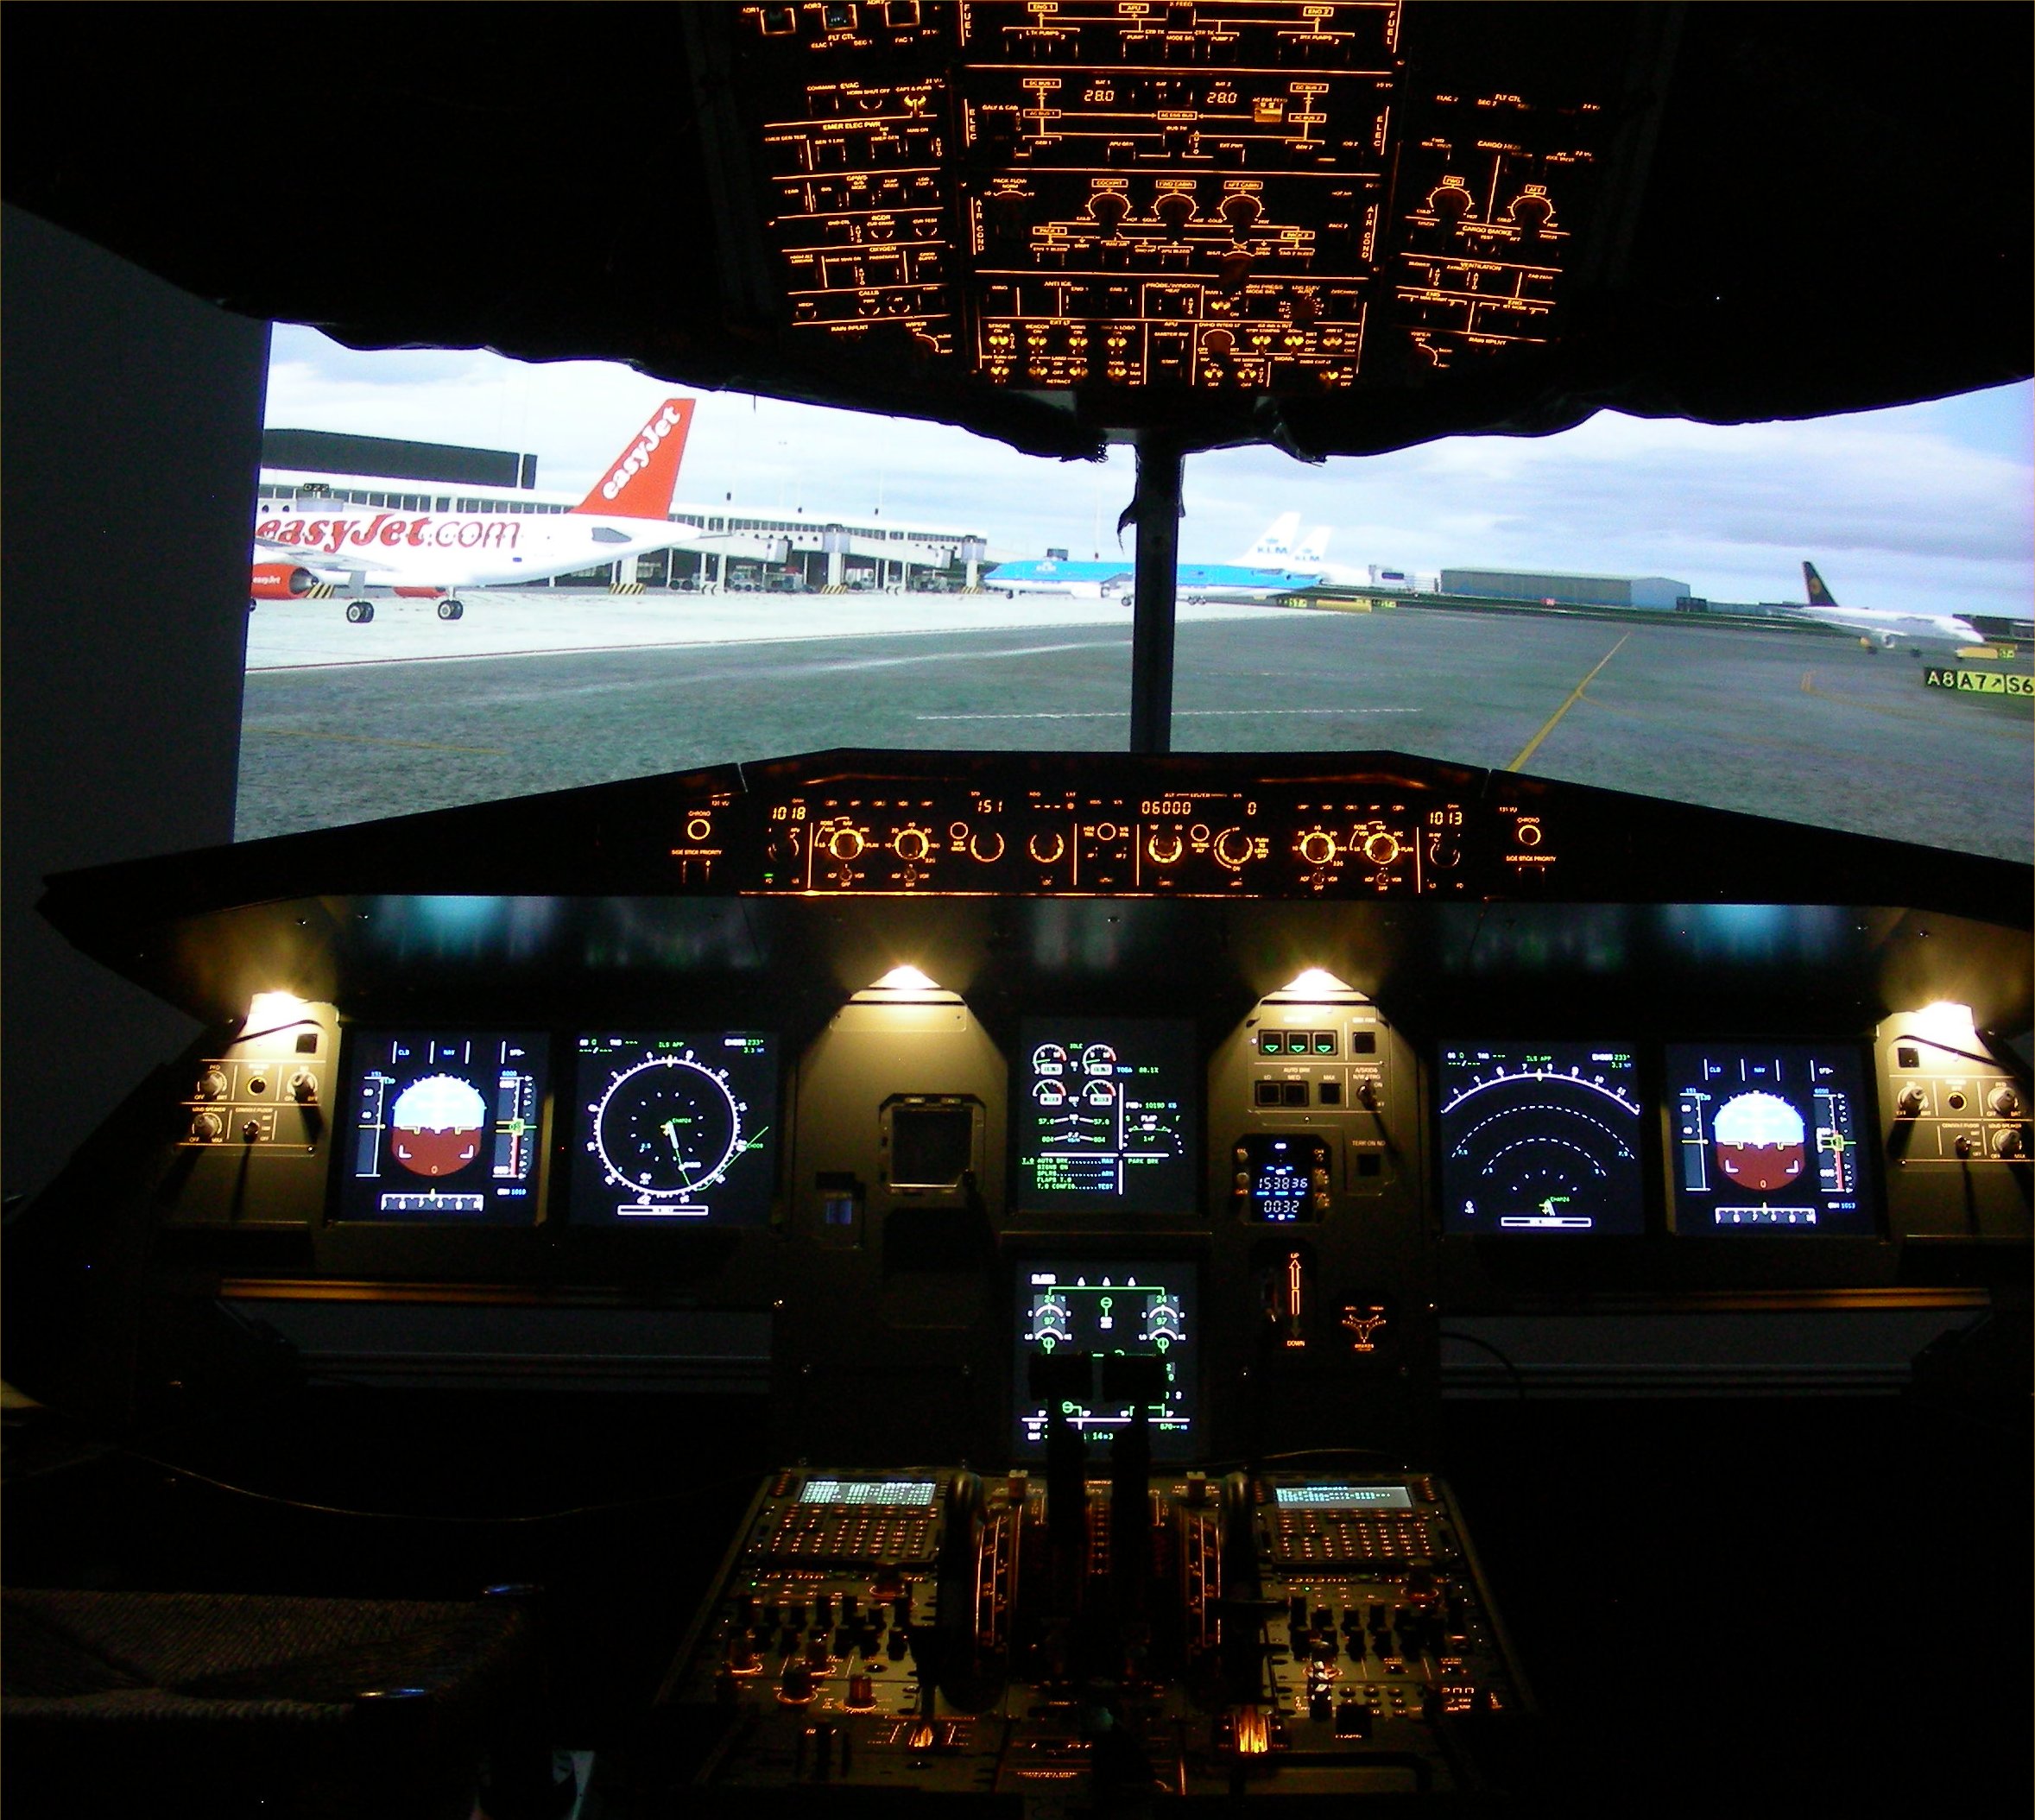
January 2017 During FSWeekend in November I saw Skalarki's hardware using warm-white LEDs for the backlighting. This looks so much better than the yellow backlight that I decided to rework all my panels. I ordered 2000 warm-white SMD LEDs in China, plus a 5 meter LED strip and started to work. It took about 3 weeks that get all the LEDs replaced. The hardest job was to replace the LED strips in the TQ, because it almost needs to be totally disassembled. Anyway, the result is great. All the green strips in the overhead and on the TQ are now clearly visible. I have about 4 meters of LED strips left, so I am contemplating on backlighting the Circuit Breaker Panel. In addition I fitted all the appropriate switches with guards on both the forward and aft overhead panels.
|
 |
||||
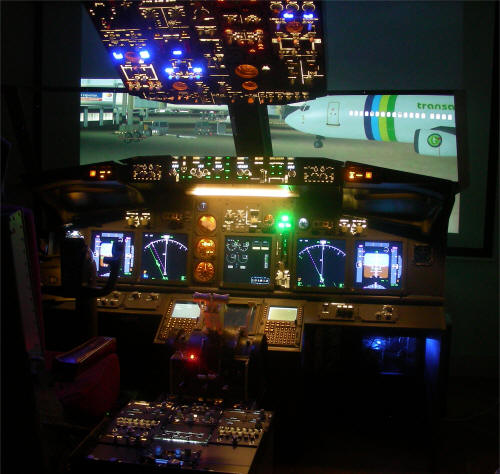
| July
2016
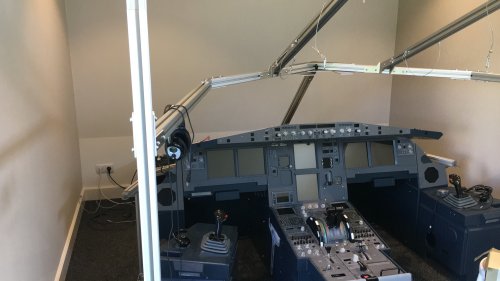
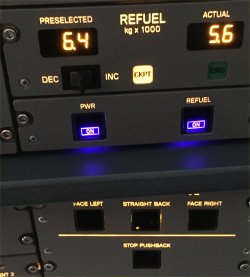
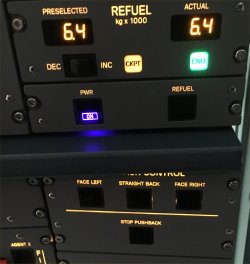
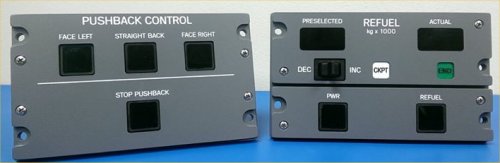
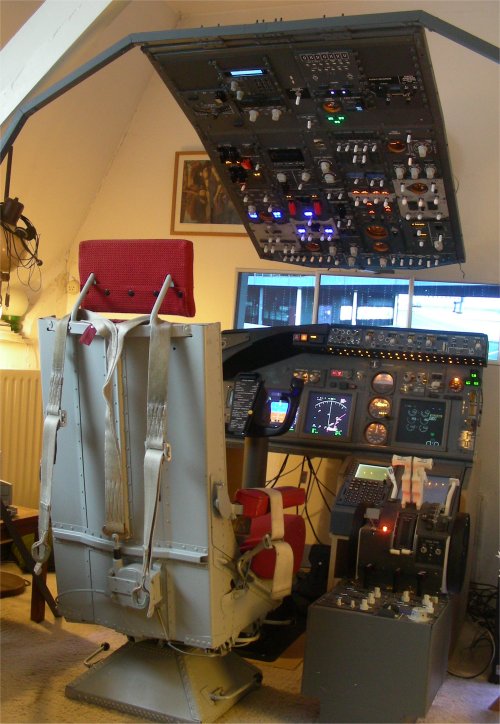
The liners arrived a few weeks ago from Vier Im Pott. Since the sim room is limited in size I was unable to fit the side windows. However, it looks nice with the front windows and the ceiling with dome lights. I moved over from the Jeehell A320 package to ProSimA320. This package is still in development, so I can help out finding problems. I also helped Skalarki with their SDK to make it run with "non-P&P" hardware. I have a DIY Skalarki overhead so I connected the 100+ switches and annunciators to inputs that I saw fit. These need to be mapped to standardized SDK calls. Since ProSimA320 also relies on the SDK when talking to Skalarki hardware, it was now possible for me to extend ProSimA320's functionality by writing a C# program that interfaces the dome lights, the refuel panel and the pushback panel.
|
 |
||||
|
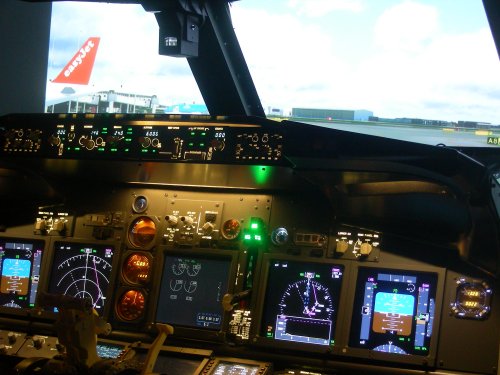
January 2016
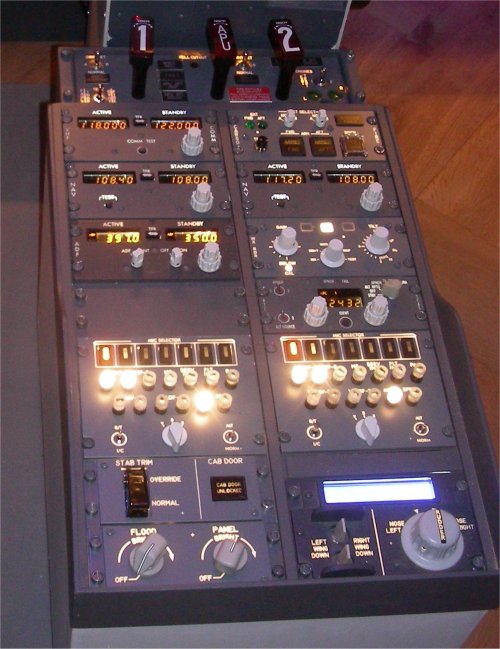
Liners have been ordered from Vier Im Pott. I hope to get them before the summer. The F/O side with side base, side stick, tiller and rudder pedals was installed a couple of months ago. This allows the simulator now to be flown with two pilots. The overhead aft panel was installed last summer. It came with a push-back panel as well as a refuel panel. Unfortunately the refuel panel is still not working because of a hardware problem. |
 |
||||
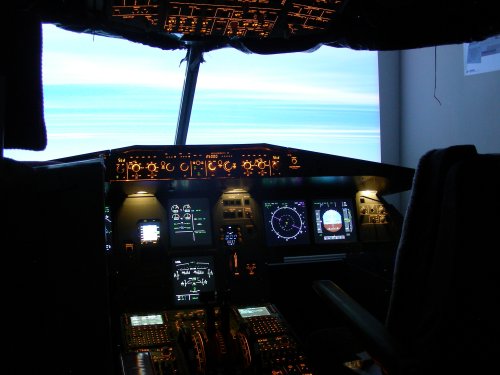
| May 2015
The future project has been realized. I was able top sell my B738 cockpit in one piece and I started to build the Airbus A320. Because of the years of experience with this hobby, I decided to take a different approach. Rather than slowly gathering parts and building item by item, I decided to purchase the hardware from only two vendors. The metal parts come from Vier Im Pott, a German company and the panels with all their electronics come from Skalarki Electronics in the UK. Both companies work together, so the Skalarki parts fit very well in the metal frames. I have ordered almost everything possible, except the aft overhead panels. The software that I use is a freeware package called Jeehell FMGS. It does in fact all the things that ProSim737 does for the Boeing 737. It lacks, however, features like Instructor Station, failures and weather. The AWACS seat that I use at the captain's side is now running on straight rails. The chair can be moved enough backwards, so there is no need for J-rails. I was able to get hold of an old 747-200 pilot chair, that I will use at the F/O side. |
 |
||||
| September
2014
Many personal things have happened since I last updated my site. However, I did make a number of changes to the cockpit.
Because of problems with the supplier I never got the F/O stuff, like seat, yoke and pedals. Note: I cannot say enough how much Prosim737 has progressed over these years. In my opinion it is the best avionics software that is available for us hobbyists
|
 |
||||
| March 2012
The problem with this hobby is that as time progresses you want to make it more and more to look like a real cockpit. So, I made a number of improvements:
|
 |
||||
| December
2011
During the last 6 months I have changed the forward pedestal so it could support two CDU's. First I was planning to add a dummy CDU at the F/O position but since Prosim supports color I changed my mind and purchased the CDU from Flightdeck Solutions. During this period I also replaced the CPFlight MCP with their PRO version. I have modified a real Korry annunciator by modifying the glass bulbs to hold 5 mm LED's. However, I am unable to get to the switch function because it's buried in a small PCB that I cannot get to. As a current project I am designing an IRS display that will resemble as much as possible the real thing. It will also support keyboard entries. More on that later.
|
 |
||||
| July 2011
A number of people asked me for an update, so here is a list of changes that I made the last 6 months:
|
 |
||||
| November 2010
Quite a few changes happened during this year.
|
 |
| Phase 9 January 2010
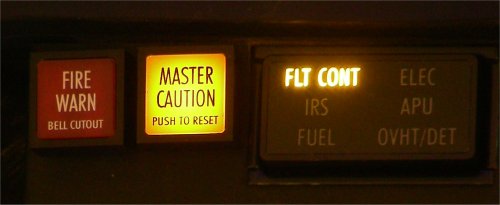
As a retirement gift my colleagues gave me an AWACS seat. Although it does not have the B737 colors, it sits and feels excellent. In fact, it's the only part of my setup that has been part of a real airplane. During the FSWeekend show in Lelystad I saw the beautiful overhead frame from SimConstruct. Since I cannot really justify its price I decided to build it myself from materials that I could pick up at my local DIY store. I am using 25 mm steel tubing, steel fasteners and M5 bolts and nuts. The result is very satisfactory. Although not as sturdy as the SimConstruct unit, it does the job for me. Total cost about €75 and lots and lots of hours. Notice that I extended the frame construction around the overhead, so it too became a solid piece. My goal to add an enclosure becomes now more feasible because I can add to the frame in the future windows, ceiling and side panels. I noticed in pmSystems all the support for a fire suppression panel, so I decided to add one.
|
 |
| Phase 8
August
2009
Because of the nice summer we had (and still have) in Holland, I haven't much done to the flight deck. I have added the lower DU and moved the radio's into a temporary pedestal bay. I purchased the FlyEngravity MIP annunciator decals, warning switches and the new captain's six-pack. Because I am using the old style MDF-based FlyEngravity MIP panels, it took a lot of cutting to integrate these. The six-pack looks wonderful. I picked up the Aircraft Controls Engineering 737 Yoke, everything now looks better and better. Because the yoke is a little bit farther positioned from the MIP, I tilted the pedals about 30° backwards. This makes the toe braking also easier.
|
FlyEngravity Warning switches and Captain's six pack |
| Phase 7 - The aft overhead panel (March
2009)
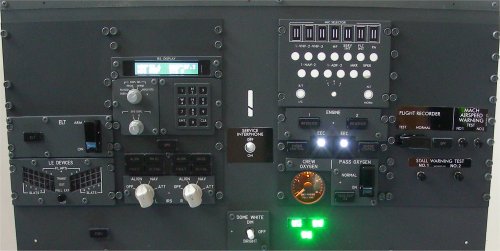
Because of the recent support for the aft overhead panel in pmSystems I decided to add it it to my system. Since I like to write software I did my own implementation of the IRS panel. Because I am using a FDS-SYS1 board which has 256 outputs I had enough free outputs to drive all 25 annunciators, plus the 32 Led's in the LED/Flap indicator. It's not clear to me at this point what to do with the audio panel. Not everything is working at this point, except the LED/Flaps indicator test switch, none of the warning test switches do anything.
|
 |
| Phase 6 - The current system and the future
(November 2008)
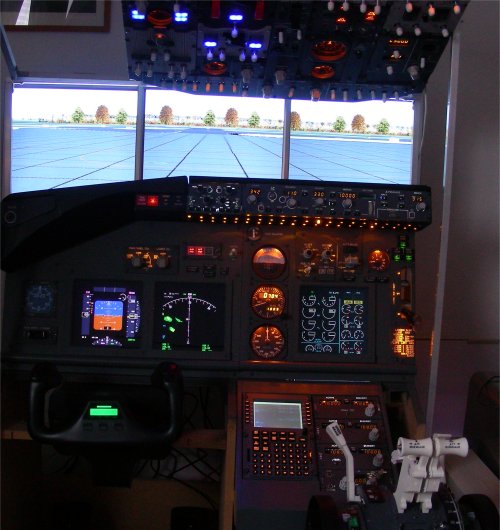
The system is rather complete as you can see from the picture on the right. The first officer's side is missing but that's on purpose, mostly because of space restrictions. You also see the motorized throttle quadrant from CockpitSonic that really adds to the immersion factor. Future projects in random order:
|
 |
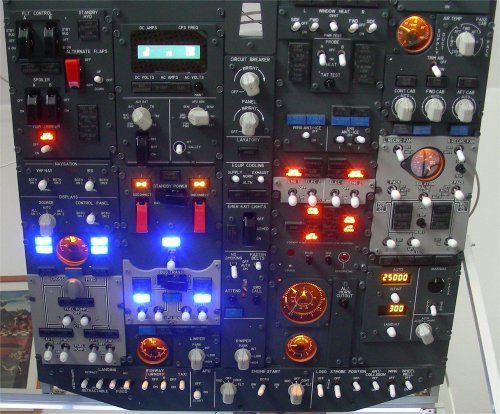
| Phase 5 - The forward overhead panel
Being a systems-type of person my hands itched to build the forward overhead panel. For the actual panel I choose FlyEngravity. I built a metal frame from 15 mm square aluminum tubes on which the 6 panels are screwed. To interface the switches and annunciators I selected the Flightdeck Solutions FD-SYS1 board. It supports 64 inputs and 256 outputs. The outputs can drive a LED directly. Sixty-four inputs is not really enough but by omitting certain switches (e.g. VH NAV, IRS) that don't do anything, plus combining switches (e.g. Window Heat Side/FWD) there was no problem. The number of outputs is more than needed. Outputs come in blocks of eight; it is best to use one output block per blue LED and put nothing else on that block. Because of the high current these LEDs draw they affect the intensity of the others. A software program that comes with the card allows you connect each input and output to the proper Flight Simulator function, thus there is no need to connect a switch or LED to a designated connector pin. The panel has 9 dual brightness blue annunciators. I could not get these to work properly with the FD-SYS1 board, so I did this myself using 9 outputs that I had left on a Phidget-64 board that I use to control the pressurization panel. There is no simple solution for the AC/DC panel and for the pressurization panel, so I built these myself. Click on the links for more information. The software that drives the panel is Project Magenta Systems (pmSystems). The beauty of pmSystems is that supports a scripting language that allows you to make modifications to how the various systems operate. For example, I added a few lines that have the cabin temperature gauge display different values depending on what is selected. |
 |
| Phase 4 - Moving over to Project Magenta
The beauty of PM is that all the hardware that I had acquired was supported. I only had to specify the COM port number in the PM software and it worked. During this phase I bought two new computers: a DELL XPS for running Flight Simulator and the CDU. The other PC was a Dell Inspiron 530 for running the ND and PFD, the stand-by Instruments and the Weather Radar. From the company I work for I got an old Dell Optiplex GXa desktop which is used solely to run the EICAS. I kept the PMDG 737-800 but had to remove all the windows in the panel file.
|
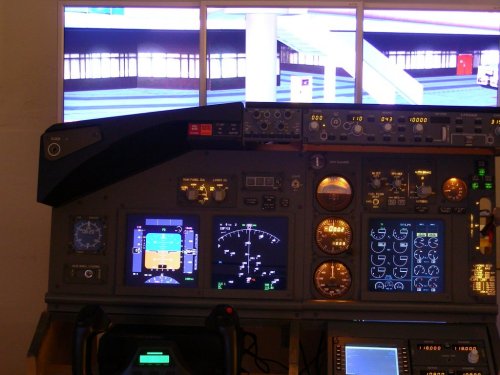 |
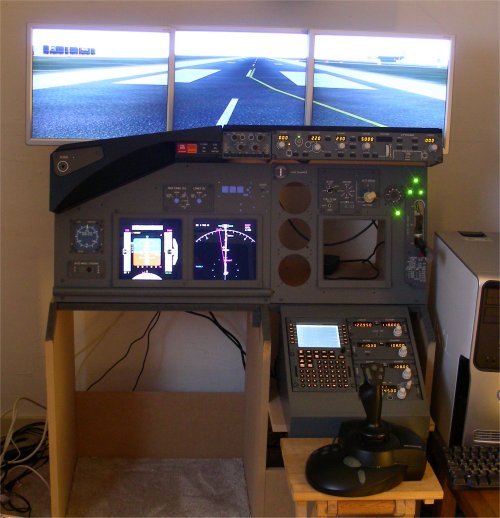
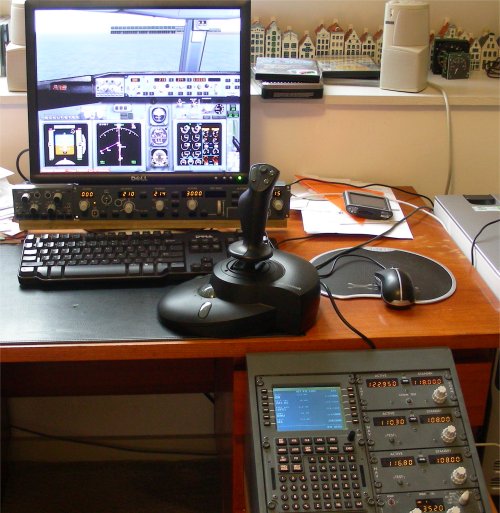
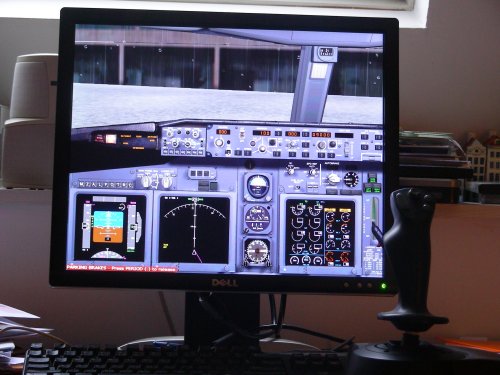
| Phase 3 - Running stand-alone
Until now I had to sit behind my desk and "fly" with the aid of a joystick and number of hardware modules. The next step was more dramatic - I moved away from the desk and built a stand-alone set-up. I purchased from FlyEngravity the Captain and Center panels, a Matrox TripleHead2Go, and four 17" monitors. In addition I built a stand from MDF to hold the panels and the CDU/Radio unit. The gear lever, the autobrake switch and the various annunciators where wired to a CPFlight MIP Interface board. By undocking the FPD and ND to a separate monitor and by going to the outside view (W), I had created a fixed-base simulator that I could "fly" without a keyboard or mouse. As you can you see in the picture there where still may holes to fill, the most conspicuous being the EICAS screen and the stand-by instruments. To fill the three big round holes was easy, I purchased the Flight Illusion standby instruments and I replaced the dummy flap indicator by a working one. At this point I had to make a major decision - can I stay with the PMDG solution or do I have to purchase software that is more amendable for cockpit builders. Except for key clicks, PMDG never released information on how to interface to the 737NG. Interfacing to the overhead functions and a number of MIP functions would be impossible. I also tried for a while to add another video card to the PC in order to undock and show the EICAS. Unfortunately, I was not able to make this a reliable solution. At the end I decided to bite the bullet and purchase the Project Magenta software. This software allows interfacing to any hardware you can think of, and very importantly, it can run distributed on different networked computers. This allows for off-loading the main computer that runs Flight Simulator
|
 |
| Phase 2 - Adding hardware
At the end of 2006 I was able to enter partial retirement and with much more free time available I decided to enter the path of building a home cockpit. One of my requirements was that during the building process I should be able to "fly" as much as possible. After extensively researching what was available, I decided start by purchasing the CPFlight MCP and EFIS modules. They looked nice and were able to work with the PMDG 737. I built a small stand for them (it is scrapped now) so I could place it as a one unit under the PC monitor. This was real fun, I could turn and press real knobs and buttons and the plane was turning, changing altitude and so on. The hardware was able to control all the MCP functions. It didn't take long to take the next step - the purchase of a CDU and a number of radio modules. The CDU is from FlyEngravity and could interface with the PMDG 737NG Series via a dedicated driver. The CPFlight radio modules are connected to the MCP and required nothing special. The beauty of this setup was that I was able to "fly" without the need to use either the mouse of keyboard. Flaps, gear, brakes, rudder and throttle were handled from the joystick. Only during startup I had to handle the overhead panel, and during start and landing some miscellaneous functions like Autobrake. |
 |
| Phase 1 - The start
Like most other flight simulation enthusiasts I started of with only a PC, a flight simulator program and a joystick. In fact, my first flight simulator was Fly! and I used it until it became apparent that it had no future. During the Fly! years I had fun with the PMDG add-ons like the Boeing 757 and 777. Another interesting add-on to Fly! was Terrascene that allowed you, by downloading USCG data, to generate very detailed scenery for US areas. Since I had lived in Washington State, I recreated everything west of the Cascades. After Microsoft Flight Simulator 2004 came out I decided to abandon Fly! (Fly2! by that time) and to move over. It really became interesting for me when PMDG released their 737NG Series. Before that I had purchased Wilco's A320 but that was a disaster. On my system the virtual cockpit was totally unusable so I was glad that PMDG came with a quality alternative. To date I am still using the PMDG 737-800 albeit in a modified form - more about that later. On the simulator I did a lot of "flying" with the PMDG 737-800, the Flight1 Cessna 172 and later the PSS A320, both on- and off-line.
|
 |